
Learn how to replace a hubcap on a semi-trailer in 3 Easy Steps.
In this step-by-step video demonstration, Larry Anders shows us how to replace a hubcap on a semi-trailer.
3 Steps to Replacing a Hubcap on a Semi-Trailer.

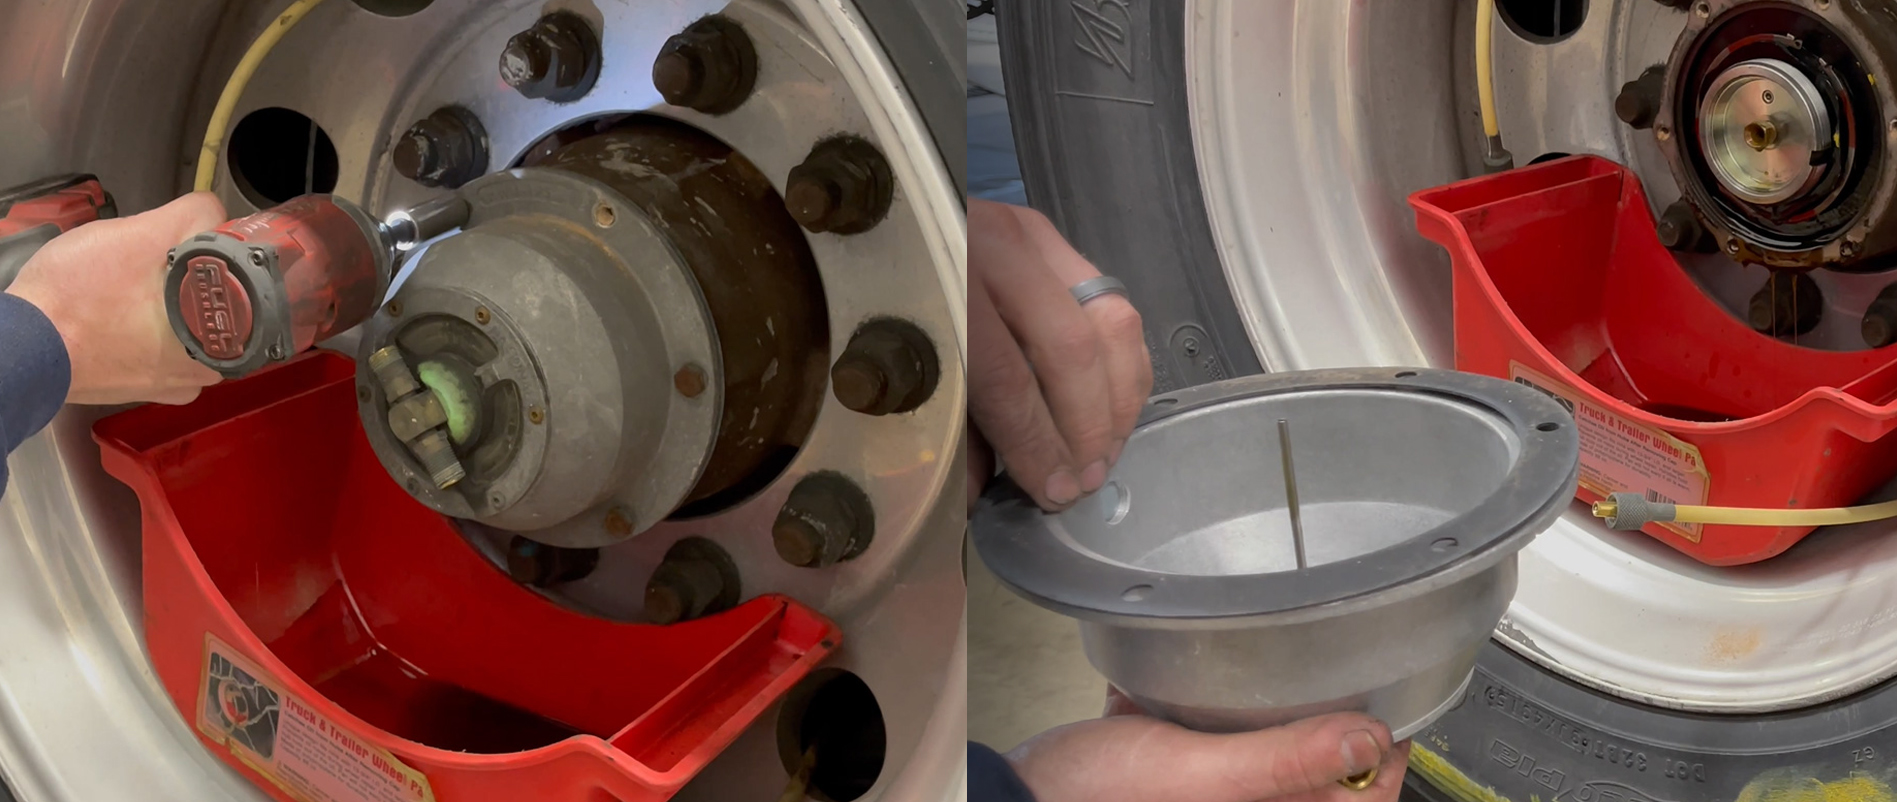
STEP #1: Disconnect the PSI lines.
In this example, we are replacing a hubcap with a PSI system attached to it. So, first, we’ll disconnect the psi lines.

STEP #2: Remove the Old Hubcap.
Remove the bolts around the perimeter of the hubcap, and remove the hubcap.
Let the oil drain into a pan
Remove the PSI insert.

STEP #3: Install the New Hubcap.
Install Hubcap:
With a new seal installed onto the new hubcap, line it up with the bolt holes and install the bolts.
Reinstall PSI:
Thread the Thru Tee for the PSI system and reconnect the lines.

Also, read Filling a Hub with Oil.
And that’s how to replace a hubcap on a semi-trailer. It’s just that easy!

I’m Larry Anders.
Check back again for another Tech Tip Tuesday.